Ring photos range from a bare shot on a leaf to a flat lay with dress, shoes and invitations, and the real split is how much you already have on hand.
If you own a vintage box, a stack of invitations or henna still fresh on your palms, build the shot around that, because a ring photo looks most like yours when it sits on something from your own wedding.
If you own none of it, the cheapest options are your hands, your shoes or a dark background, and a macro lens is what makes any of them look sharp.
1. Rings on Leaves
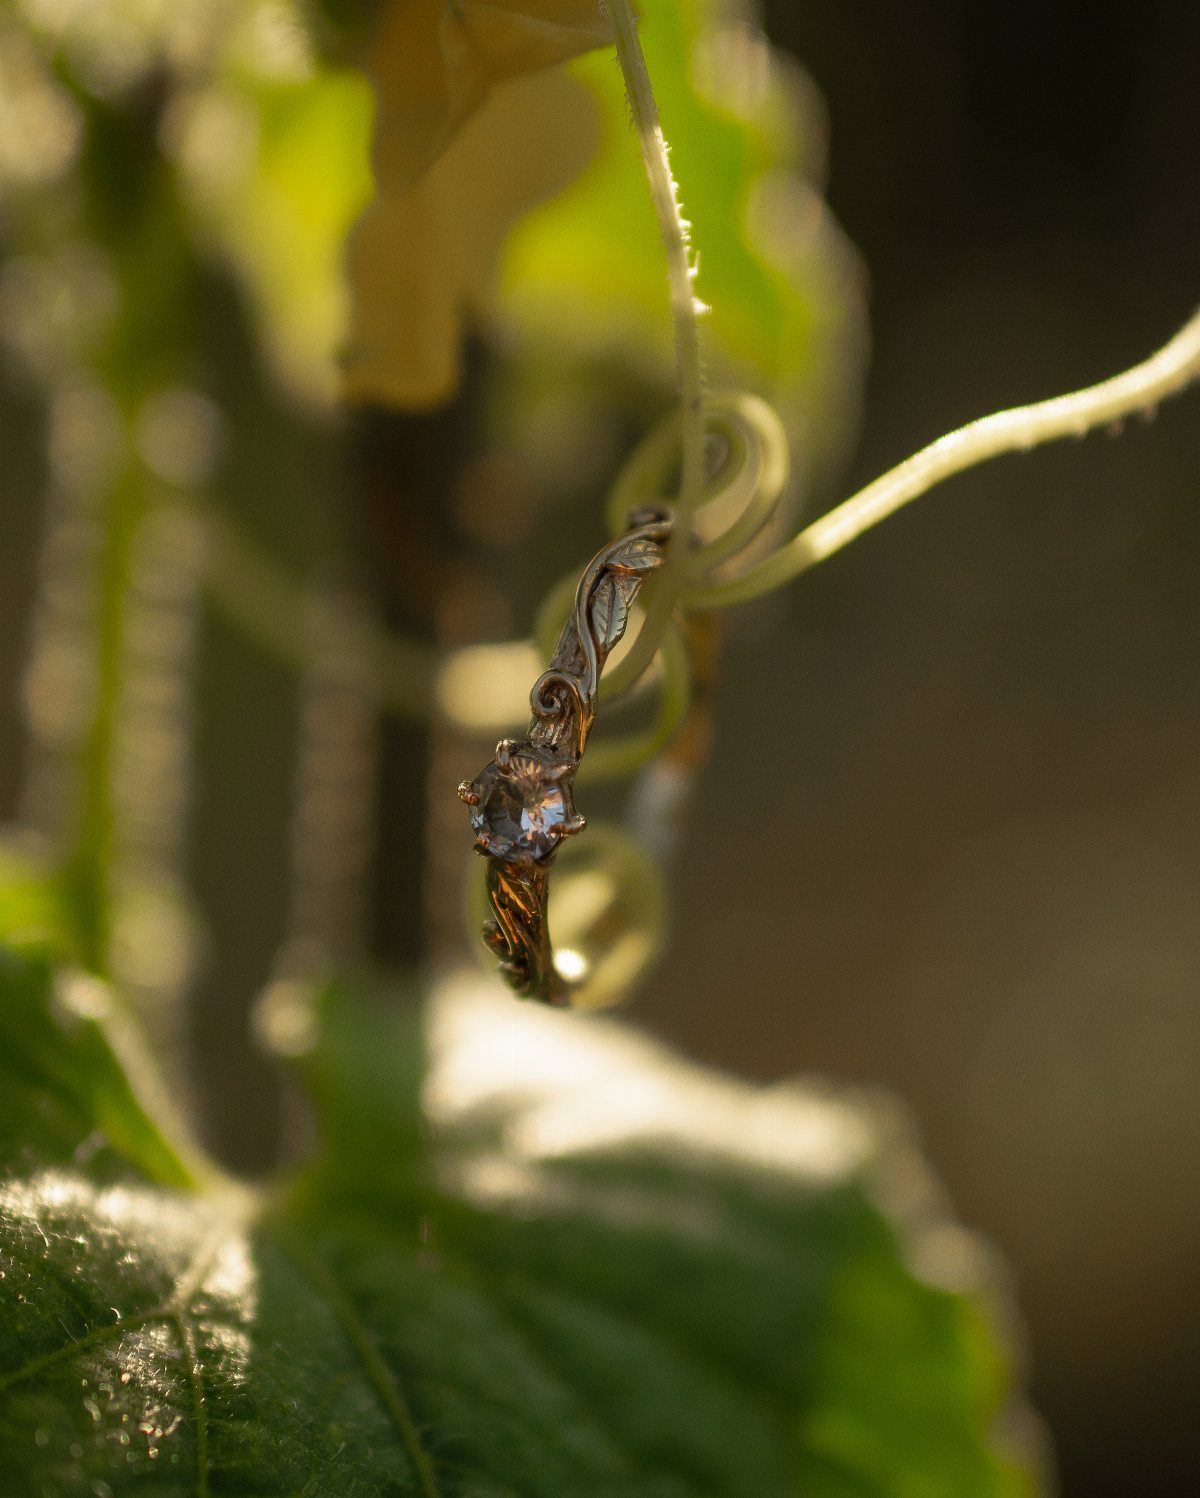
A ring hung from a curling vine tendril gives you a shot that needs no props.
Look for a thin, flexible tendril with a small loop at the end, and let the ring dangle where sunlight comes through the leaves behind it.
Shoot in soft light so the diamond sparkles without harsh glare. A macro lens is worth requesting, since it holds the ring in crisp focus and turns the surrounding leaves into a soft wash of green.
2. Include Wedding Invitations
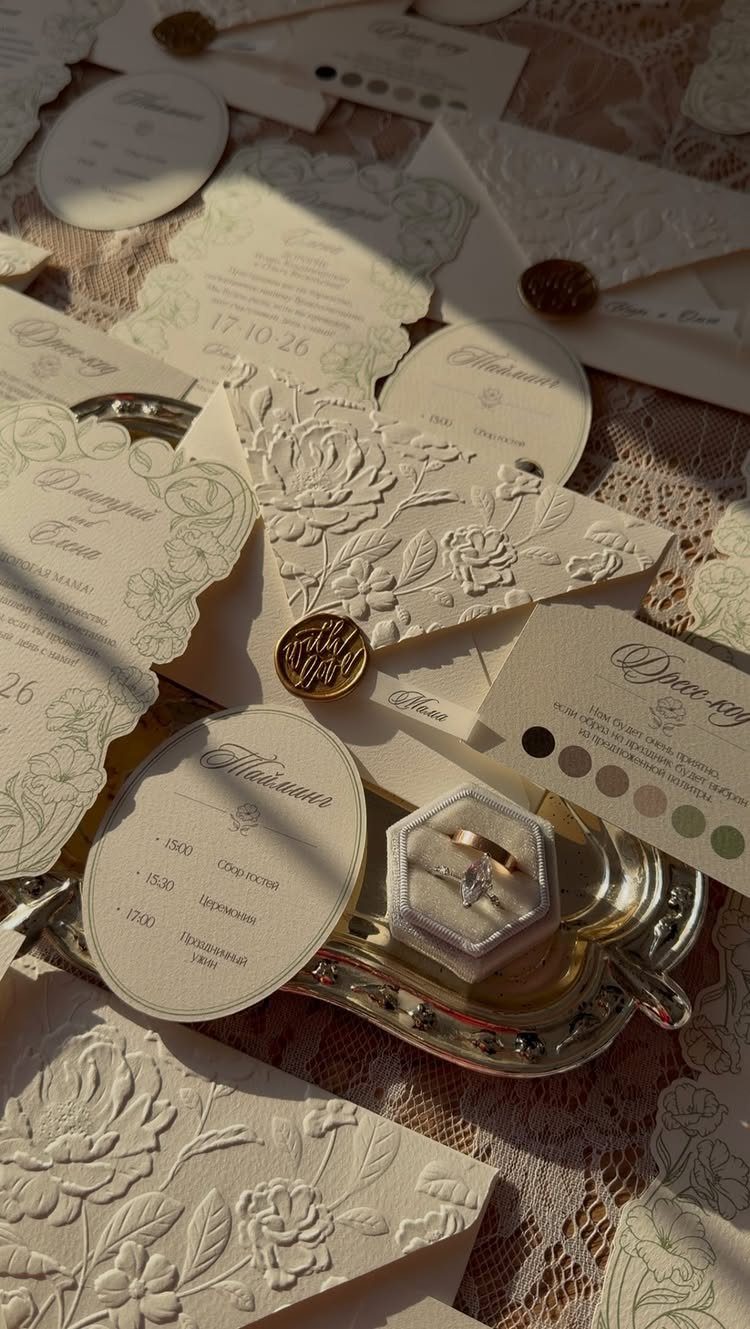
Stationery gives rings a place to sit that already matches your wedding. Set the box on top of the invitation suite and let the embossed paper fill the frame around it.
A silver tray and a layer of lace underneath add texture without clutter.
Hand your photographer a full invitation set, not just one card, so there are enough pieces to arrange. Add the envelope liner and any ribbon to the frame, because those small touches tie the rings to the invitation suite.
3. Couple Showing Their Rings
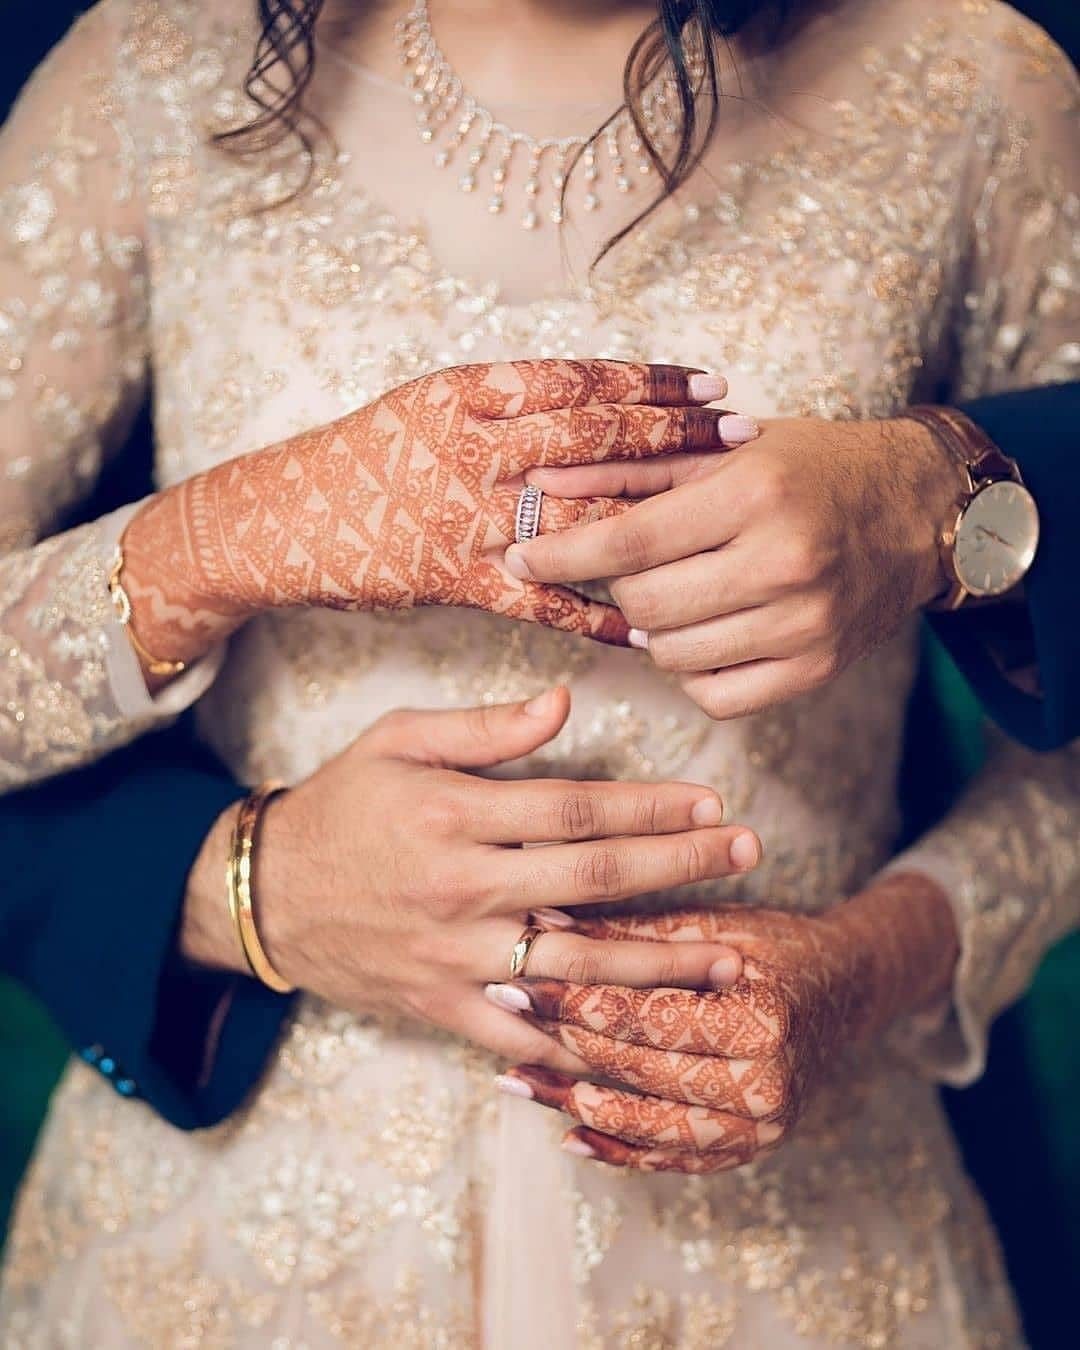
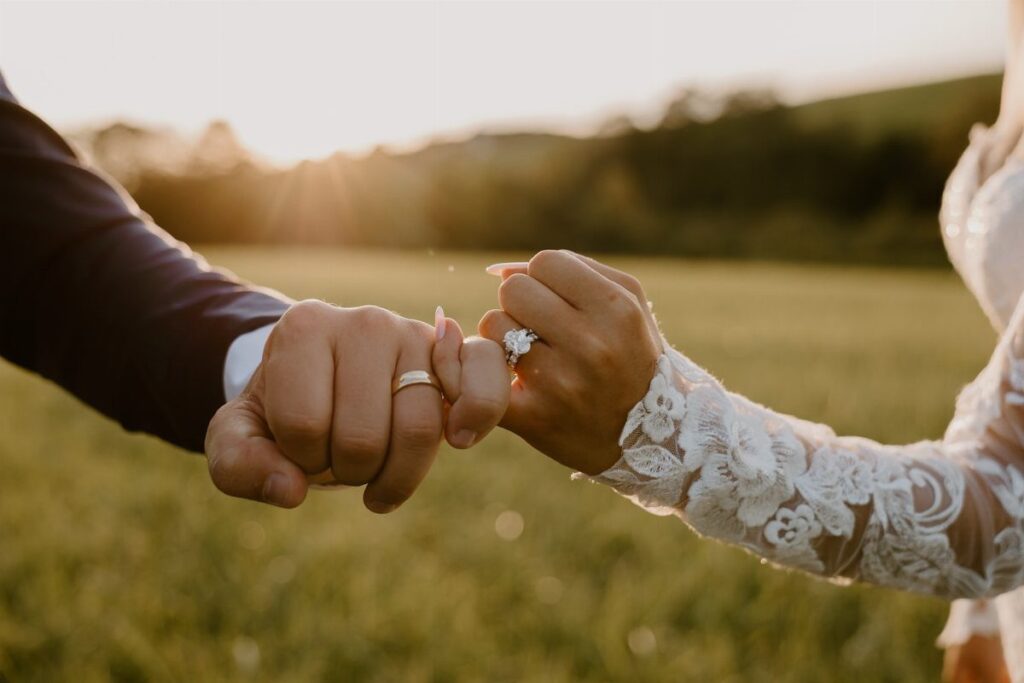
Candid ring shots work best when you stop posing and simply show the rings to each other. Hold your hands close together, mid-gesture, and let the photographer shoot while you laugh or adjust a sleeve.
Henna, a watch, or mismatched metals all add detail, so don’t hide them. A slightly loose frame beats a stiff one every time, so keep your hands relaxed and let the rings catch the light on their own.
4. Capture Rings with Love Letters
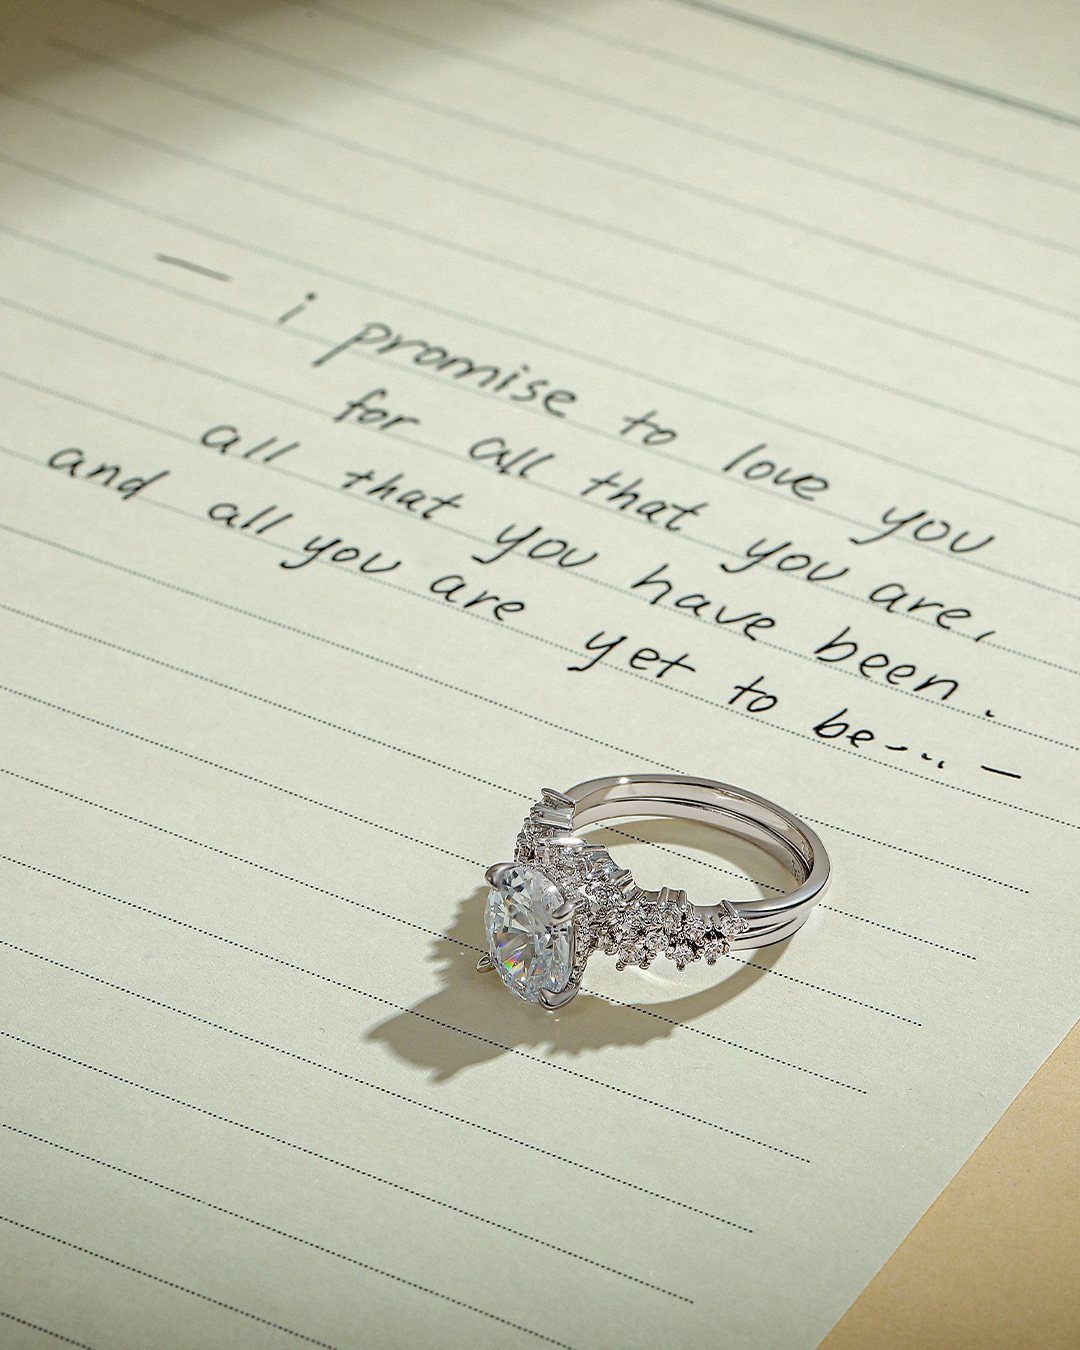
Handwritten words turn a ring photo into something only you could have taken. Rest the rings right on the page of your vows or a letter, and keep a few lines legible so the sentiment reads.
Plain lined paper looks personal, not styled. Keep the original afterward; the photo won’t replace it.
5. Engagement Ring
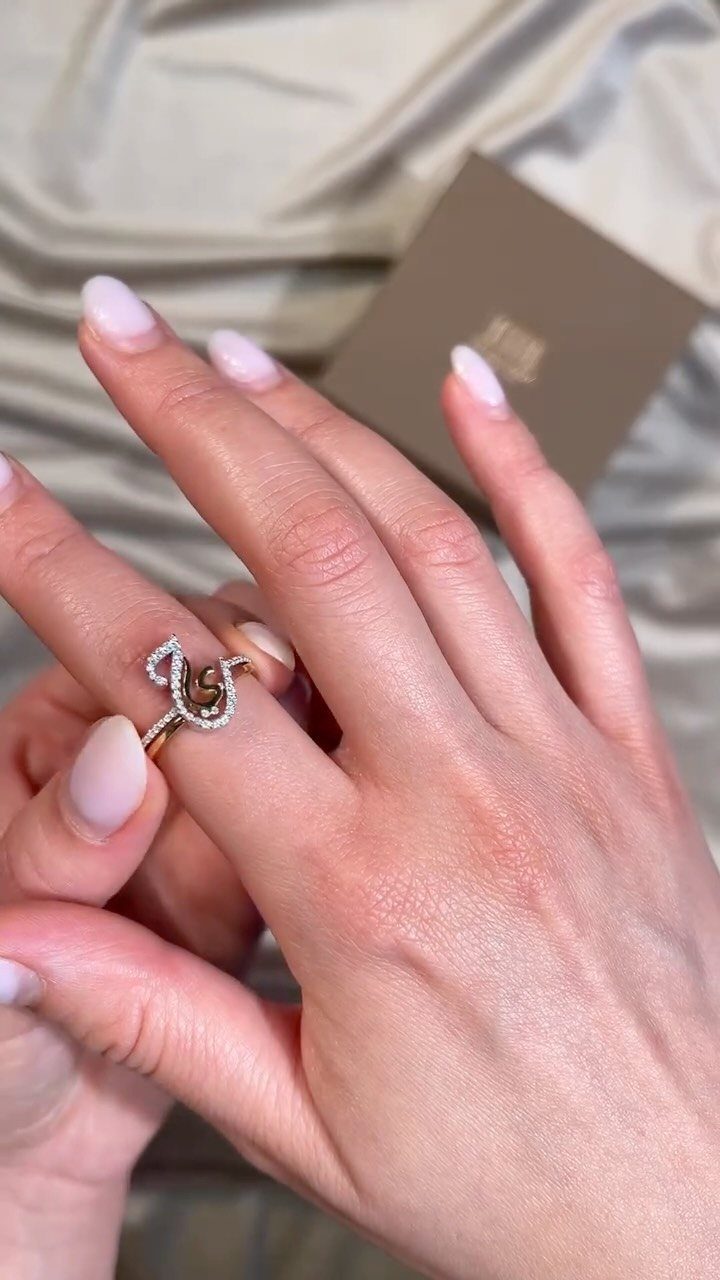
Give the engagement ring its own session before the bands join it. It’s the piece that carried the proposal, and a close shot of it on a hand, with a jewelry box softly blurred behind, tells that story alone.
Clean the ring first, since fingerprints show up under macro focus.
Fresh nails matter too, because a close crop shows every detail. Ask for this shot separately from the wedding bands so it gets full attention.
6. Layered Hands
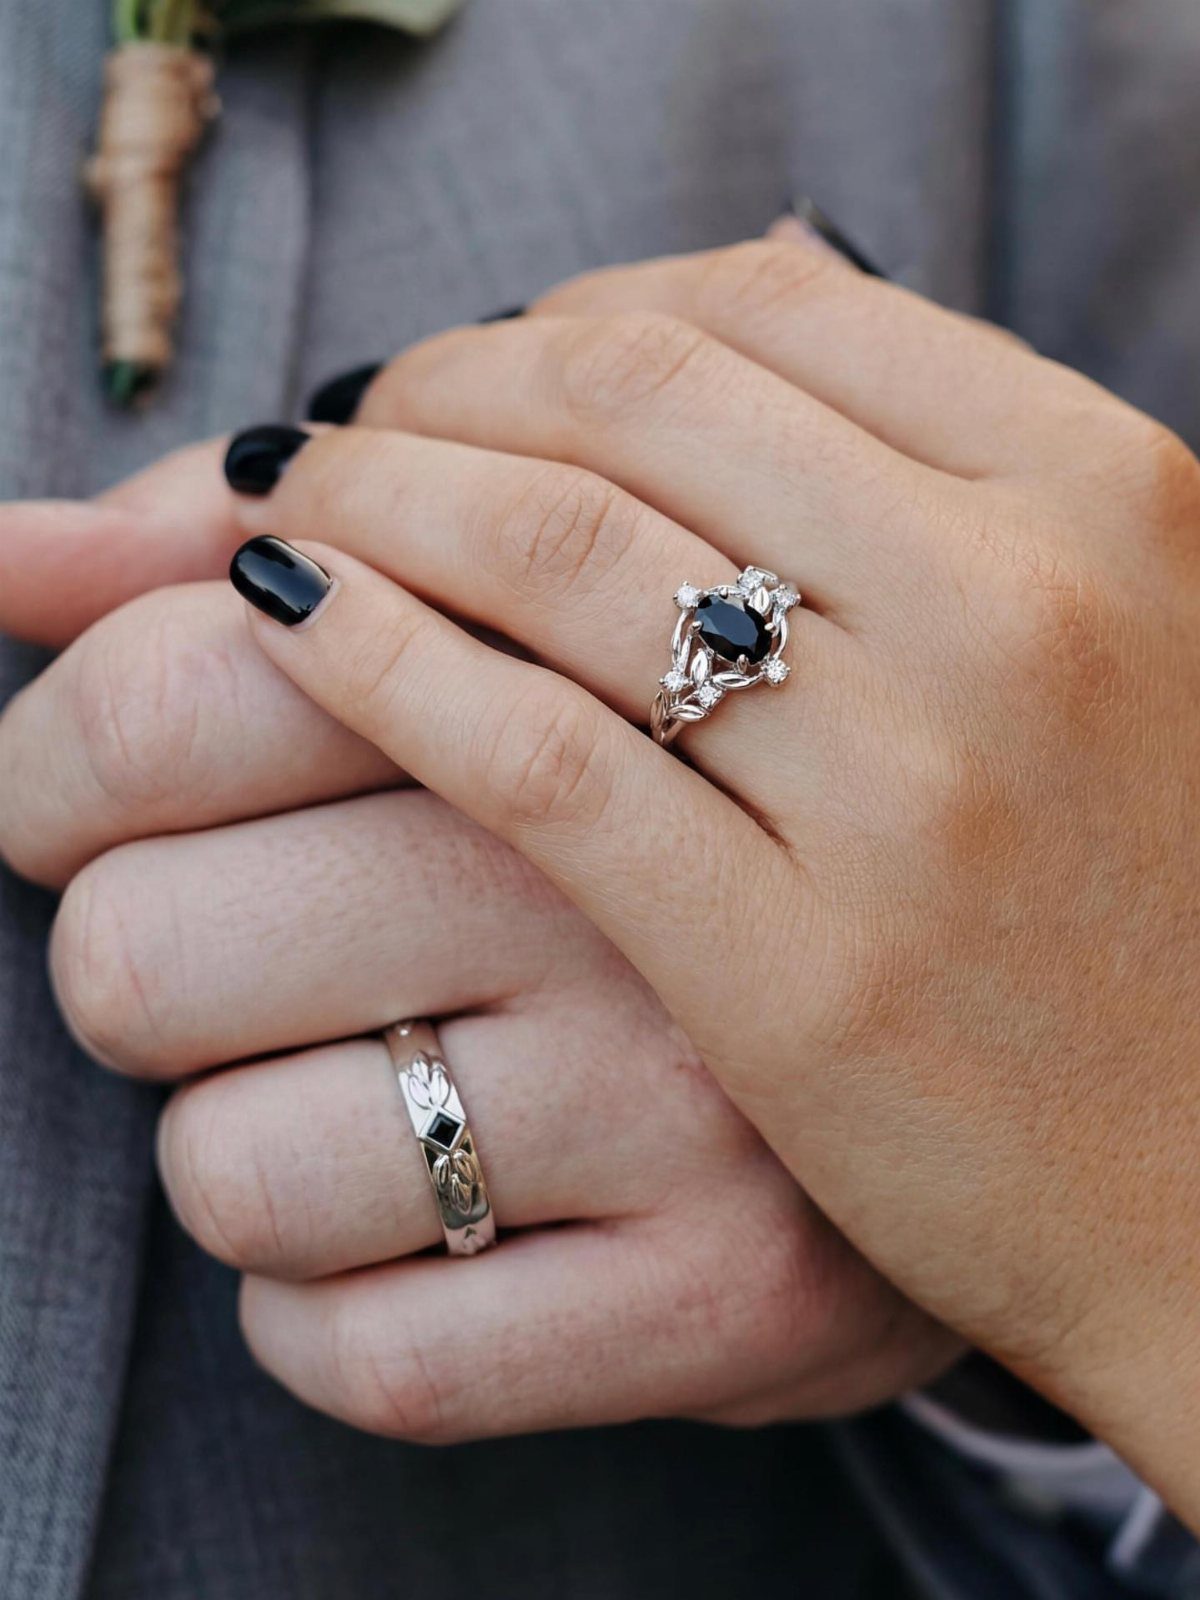
Stack both of your hands, one on top of the other, and the rings sit close enough to read as a pair. It takes about a minute and works almost anywhere.
Wear something with a plain texture, like a suit jacket, so the metal and stones stand out against it.
Keep your fingers relaxed and slightly angled toward the lens so every ring catches light. I like this one for its simplicity, since it needs no props at all.
7. Wedding Shoes
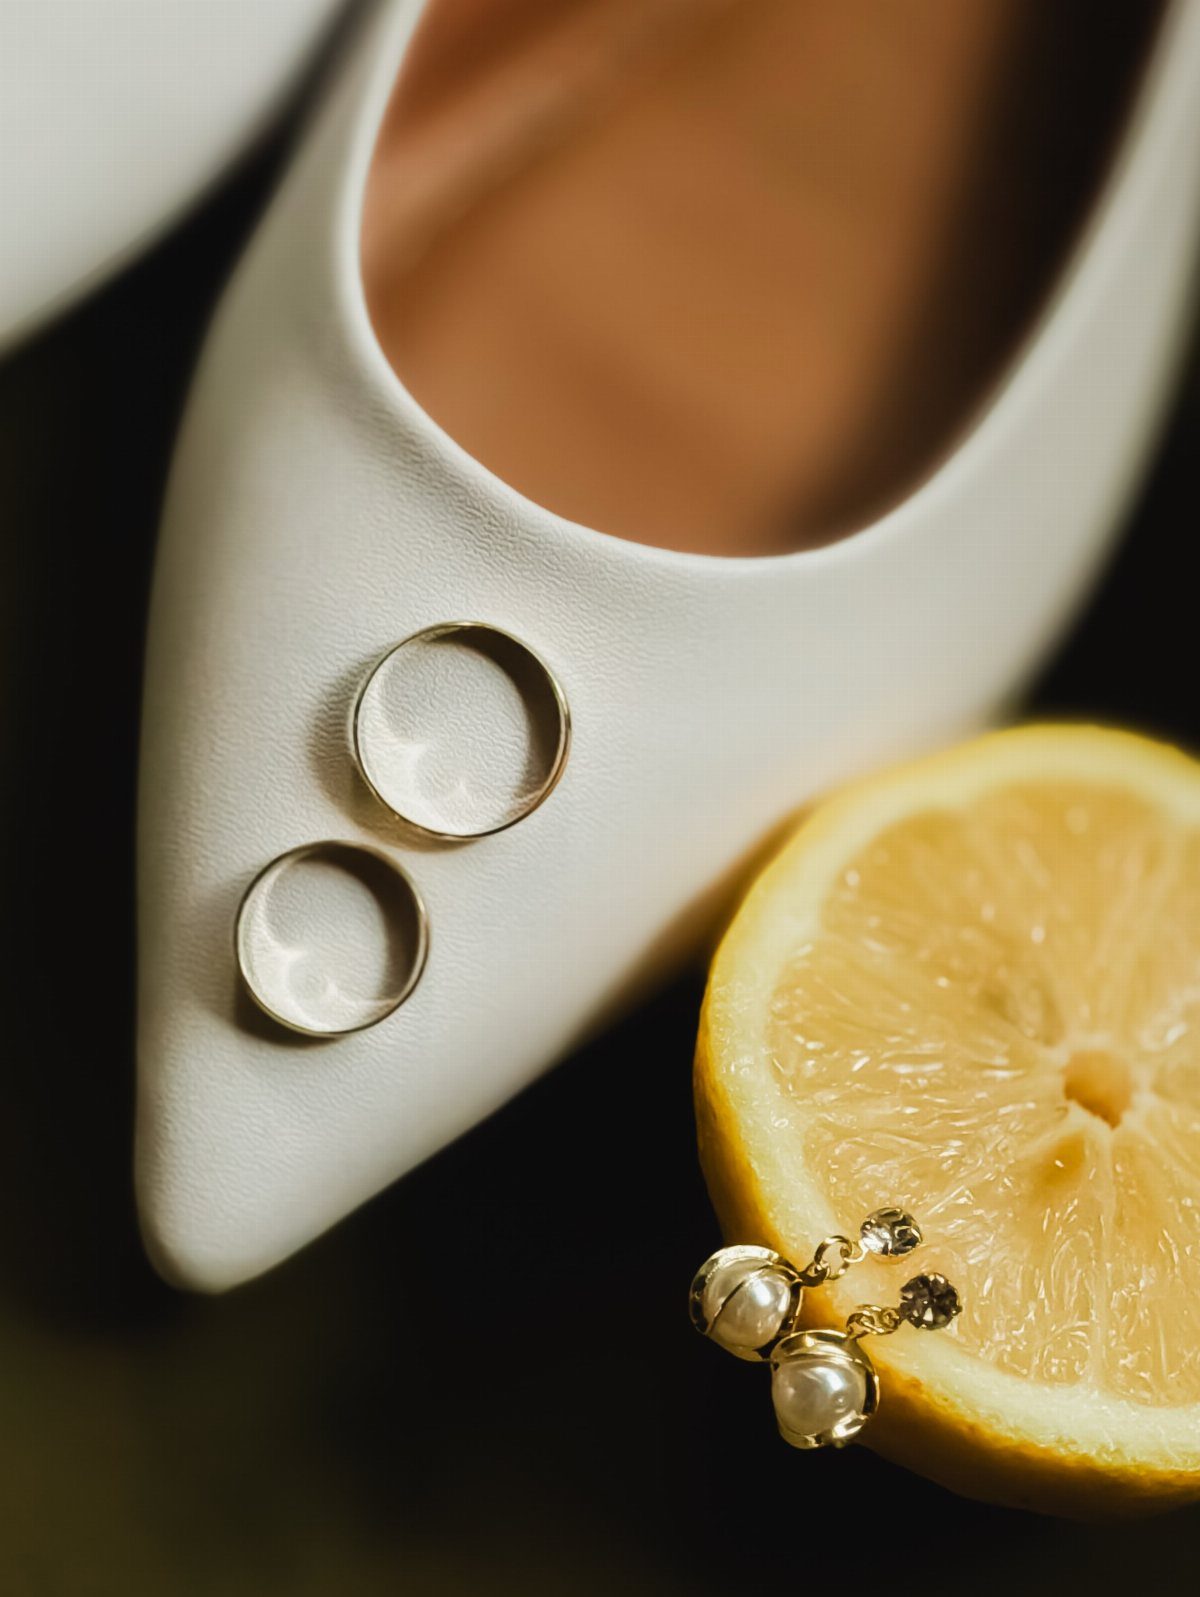
A pointed-toe shoe gives the rings a ledge and a frame in one. Set the bands on the toe box, or slip one through the strap or buckle so it peeks out from the shoe’s own details.
Keep the props few. Wipe the shoe sole-clean before you shoot, since scuffs show up close.
8. Incorporate Personal Elements
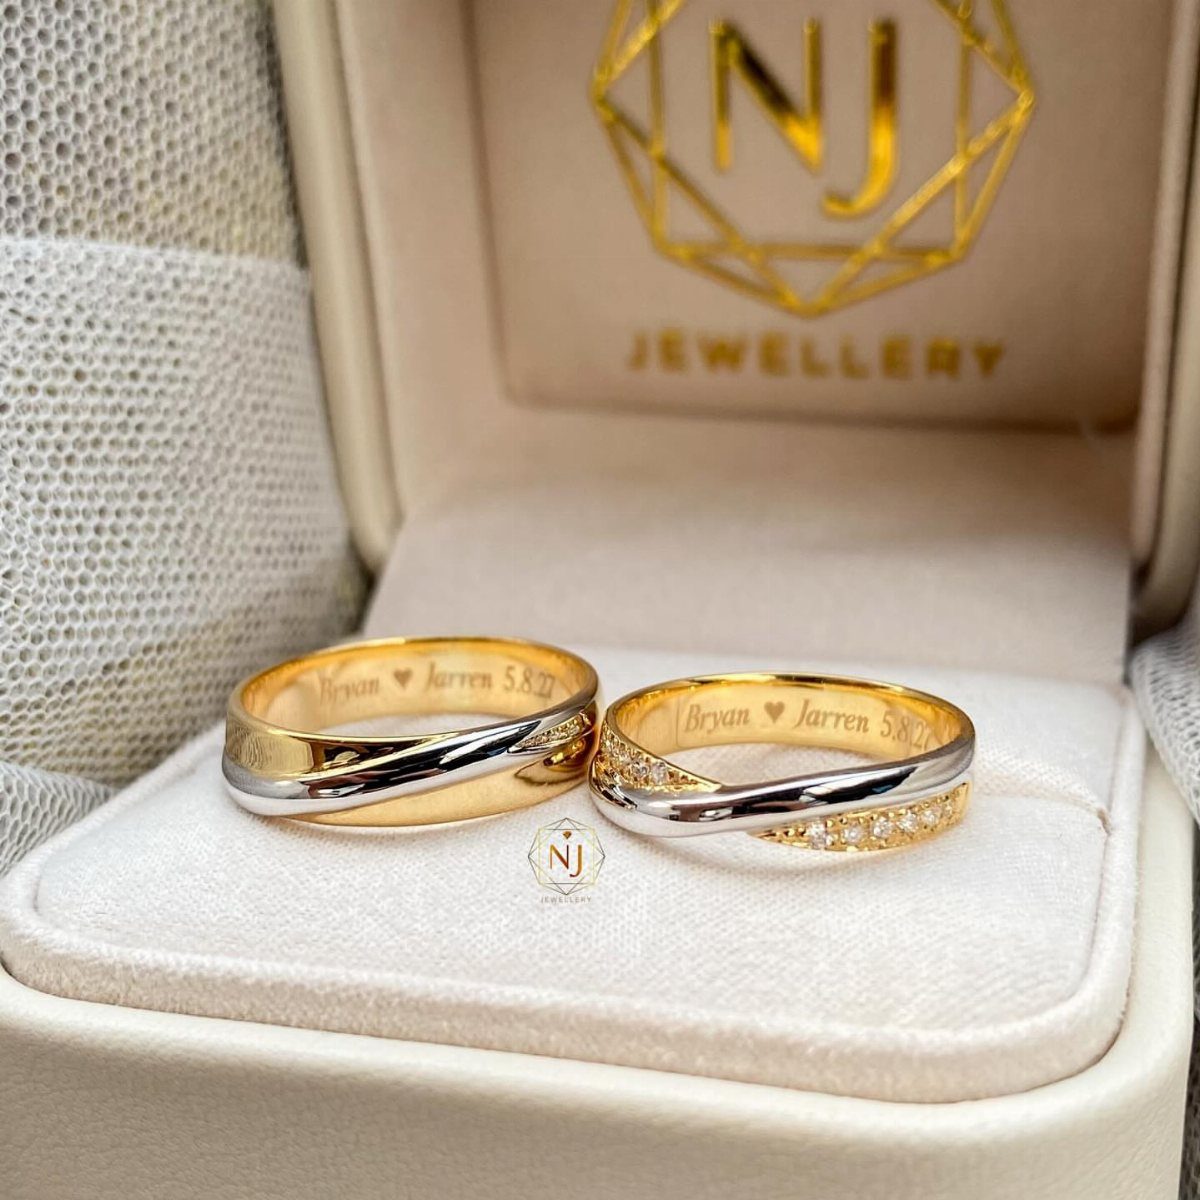
Engraving is the personal element already built into the rings. Open the box so the inside of each band faces the lens, and the names and wedding date read clearly: "Bryan ♥ Jarren 5.8.21" is the kind of line worth showing.
Ask your photographer for one frame where the engraving is sharp, then add a small prop from your story, such as a ticket or a pressed flower, if you want more.
9. Rings with Cultural Symbols
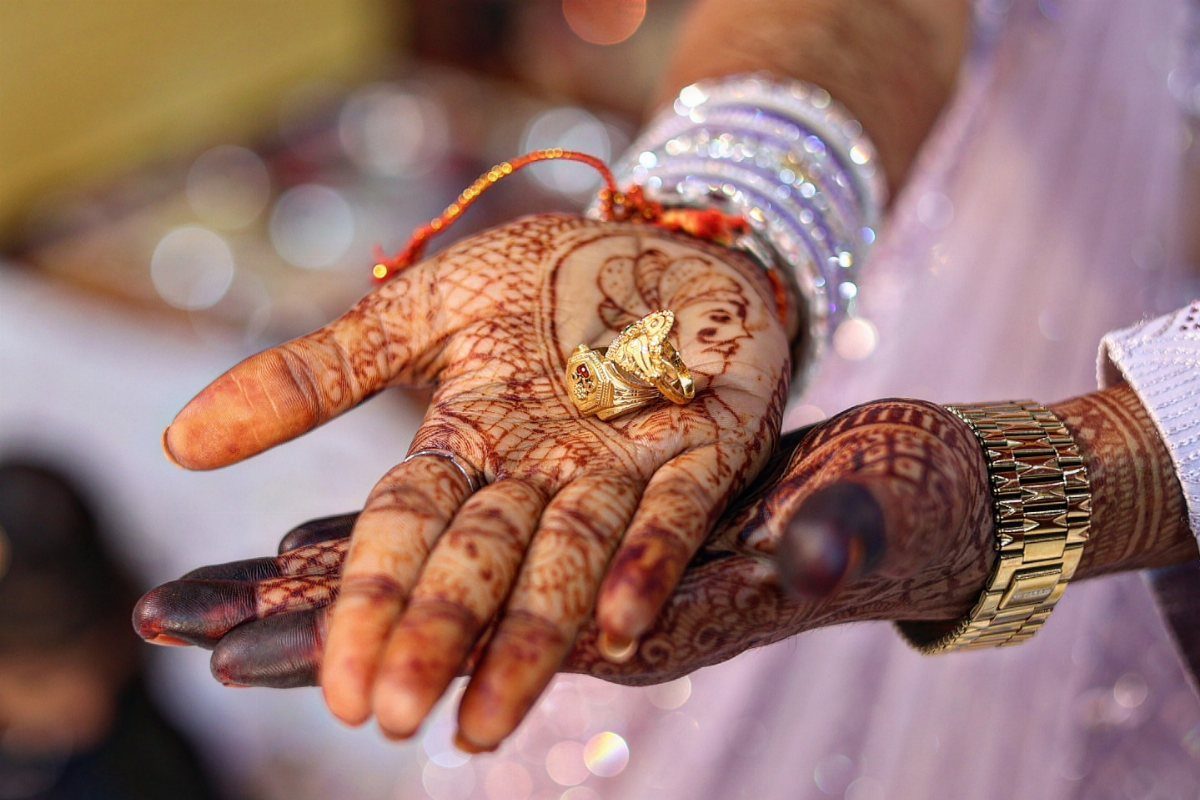
Henna is the detail I would build a ring shot around. Hold a ring in palms that carry the patterns, and let bangles and a watch stay on, since they tell a cultural story no prop can.
Schedule the ring shoot after the henna is applied and dry, so the design is dark and crisp.
Ask for a shallow focus so lights glow softly behind your hands. Bring any jewelry you plan to wear, because the photographer can then frame it together.
10. Capture Rings with Wedding Decor
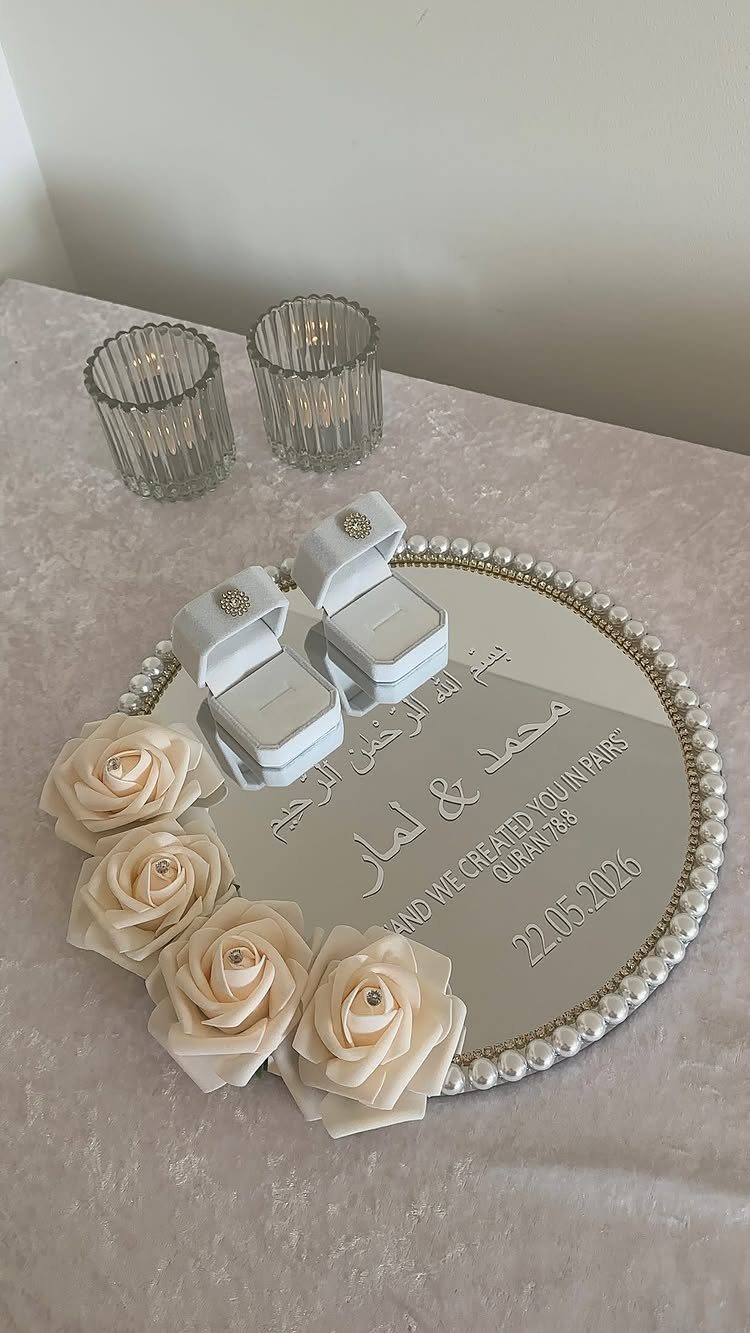
Your own decor can hold the rings better than any borrowed prop.
Ask your florist or decorator for a spare tray before the ceremony setup is packed away.
A mirrored surface doubles the boxes, so wipe it clean and angle the shot to avoid catching the photographer’s reflection. Text that carries a verse or your names makes it unmistakably yours.
11. Flat Lay with Wedding Details
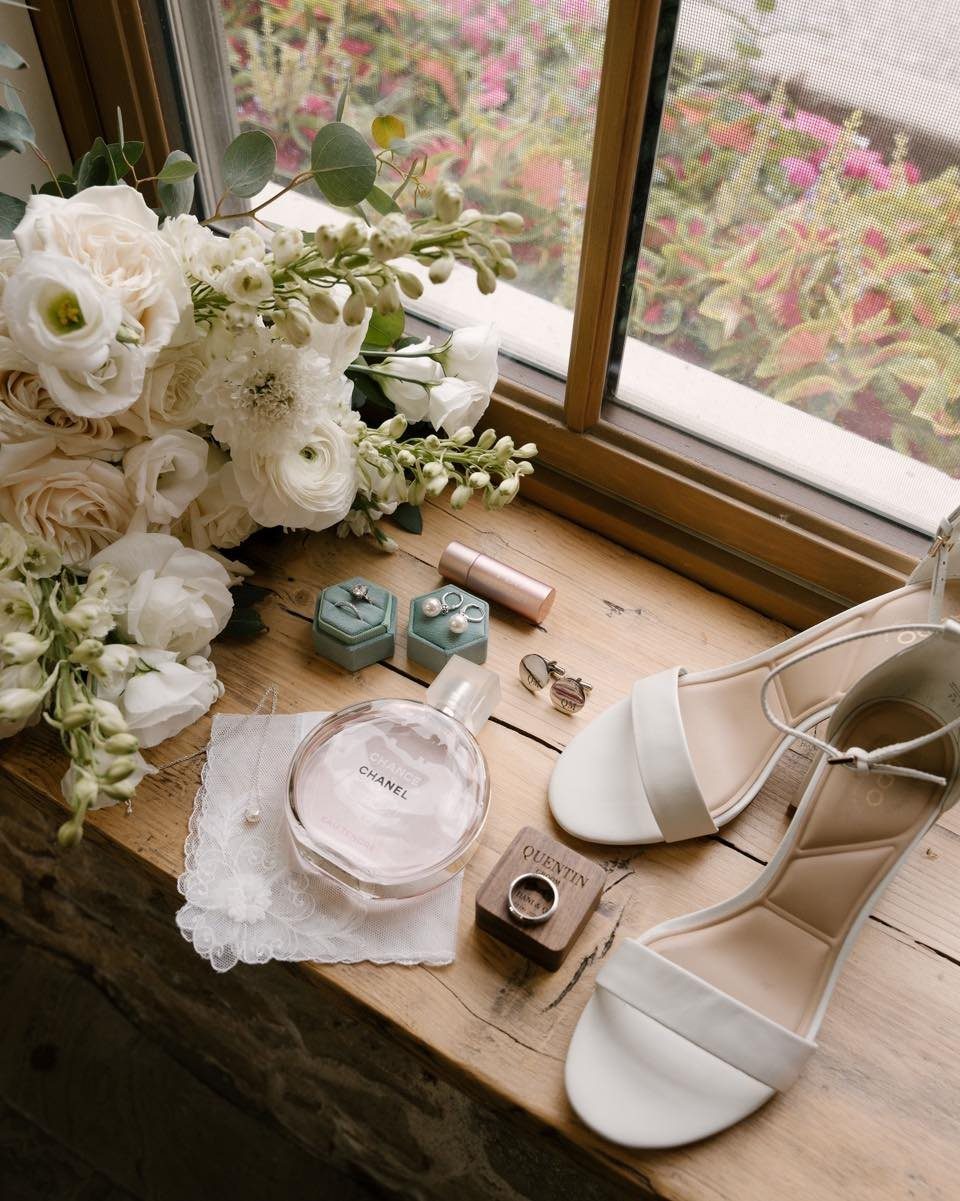
A windowsill flat lay gathers the morning’s pieces in one frame: bouquet, perfume, heels, and rings in their boxes. Wood and window light make everything look warm without editing.
Arrange the largest item first, the bouquet, then tuck the rings and a small box near the front where they stay sharp.
Give the photographer everything early, before getting dressed. A sill is narrow, so I would pick just a few items rather than crowd it.
12. Capture Rings with Wedding Dress
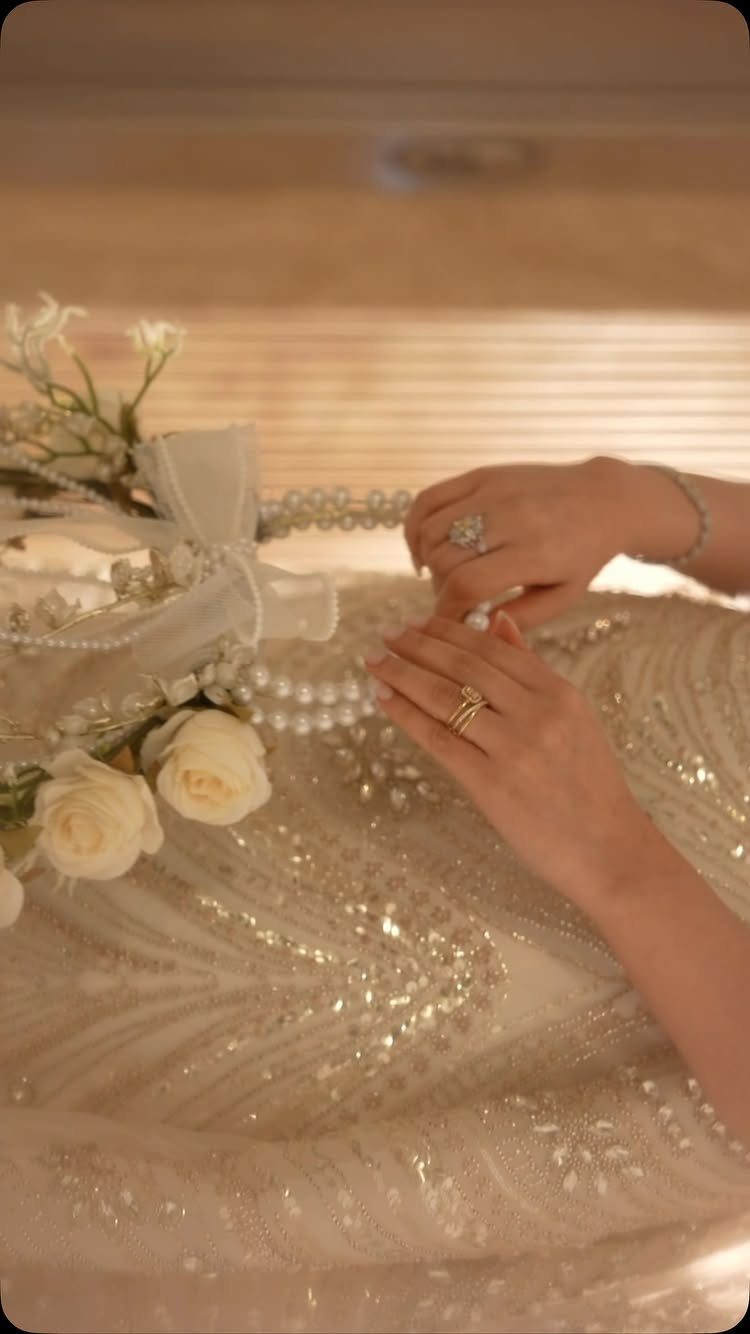
Rest your hands on the beaded bodice and the rings meet the gown’s texture directly. White roses and pearls beside the rings keep the palette soft, so the gold stands out.
Let the dress hang or lie flat before you pose, and wear the rings with clean nails.
Keep your hands relaxed, not pressed down, so the beadwork stays in focus. Ask the photographer to shoot close; the gown’s detail is half the picture.
13. Rings in a Vintage Ring Box
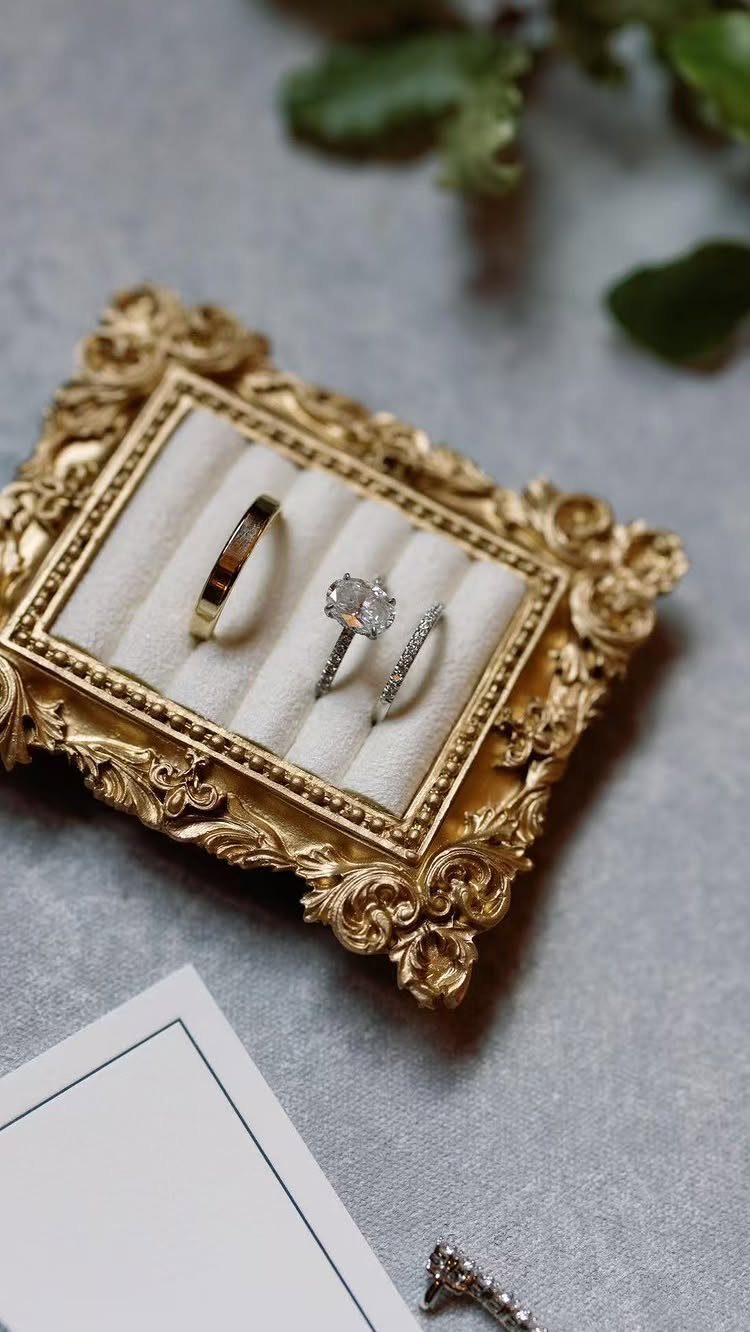
A vintage box with an ornate gold frame and a white velvet insert gives the rings a small stage of their own, and it holds 2 or 3 bands in place while you shoot.
Pick a box whose metal matches the bands, and keep the velvet white or cream so the diamonds stand out against a quiet background.
Pick the box before the shoot, not on the day, so the photographer can see how it sits against the venue’s colors. Keep the velvet clean, since lint and dust show up in a close frame.
I would hand over the box with all 3 rings already seated, so the first frame is ready the moment the photographer opens it. A few leaves beside it are plenty.
Choosing Backgrounds
Texture is the quickest way to give a ring photo some personality, and stone, wood, metal, and paper all work. Pick one that suits the ring’s style and colors, and keep it from competing with the ring for attention.
For a dramatic look, try a black or very dark background. Expose the rings 2–3 stops brighter than whatever sits behind them, and a dark backdrop sinks away while the metal and stone pop forward.
Contrast does the work here, so tell your photographer you want this look before the shoot. A dark surface needs a separate lighting setup, and it’s easier to plan for than to fix later.
Using Macro Lenses
Facets of the diamond and the tiny prongs and milgrain of the setting, the things your eye skips over at arm’s length, show up clearly once a macro lens is on the camera.
Ask your photographer whether they own one before you book, since it’s a straightforward question and the answer shapes your ring shots.
Because macro glass can shoot at very wide apertures, the focus plane gets razor thin, and anything behind the rings blurs into soft, creamy bokeh. That’s useful when the surface behind the rings is busy.
Shooting on a phone? For a few dollars, a clip-on macro attachment for a phone lets you move in close enough to fill the frame with a single ring.
Whatever you shoot with, clean the rings thoroughly first. Smudges that vanish in normal life jump out at this magnification.
Frequently Asked Questions
How to take a good wedding ring photo?
Start with soft light, a background with some texture, and a clean ring.
Soft light keeps the diamond sparkling without harsh glare, and a macro lens holds the ring crisp while everything behind it blurs. Wipe off fingerprints, lint and dust first, since close focus shows every smudge.
What is the best background for wedding ring photos?
Pick a texture like stone, wood, metal, or paper that suits the ring’s style without competing with it. A dark surface needs its own lighting setup, so tell your photographer before the shoot.
Do I need a macro lens for wedding ring photos?
I’d ask for a macro lens, since it pulls in the facets, the prongs and the fine milgrain edging that you’d never notice at arm’s length.
Phone shooters can get close with a clip-on macro attachment, which costs just a few dollars and lets one ring fill the whole frame.